
Truth is, I’ve wanted to write a lesson on automated testing for a long time. But environment setup always stopped me.
Enter Docker—The perfect tool to solve this problem. For those who have turned away from Docker before, I promise, we’re going to make this easyOr, at least, easy adjacent. And once it’s set up you can spin up automated testing on any project at a moment’s notice.

Images
Are micro filesystems, Build by docker using instructions in your Dockerfile to run the service.
Volumes
Are the bridge between your filesystem and Docker. We’ll use docker-compose to make configuring these easy.
Containters
Are a micro-Linux OS, running with your images and volumes mounted
Windows and MacOs users will install Docker Desktop –which installs Docker along with a fancy GUI. Linux users get to use their favorite package manager.
Windows
- Open an admin Power Shell as admin and run wsl
- Restart
- Open a Power Shell and run
wsl --set-default-version 2
- Download Docker Desktop and install.
- Restart–and you’re in.
MacOs
Download and install Docker Desktop.
#It's generally worth it to make sure we're on docker-ce
$  sudo apt-get remove docker docker-engine docker.io containerd runc

$  sudo apt-get update

$  sudo apt-get install ca-certificates curl gnupg lsb-release

$  curl -fsSL https://download.docker.com/linux/ubuntu/gpg | sudo gpg --dearmor -o /usr/share/keyrings/docker-archive-keyring.gpg

$  echo "deb [arch=$(dpkg --print-architecture) signed-by=/usr/share/keyrings/docker-archive-keyring.gpg] https://download.docker.com/linux/ubuntu \
$(lsb_release -cs) stable" | sudo tee /etc/apt/sources.list.d/docker.list > /dev/null

$  sudo apt-get install docker-ce docker-ce-cli containerd.io

$  sudo curl -L "https://github.com/docker/compose/releases/download/1.29.2/docker-compose-$(uname -s)-$(uname -m)" -o /usr/local/bin/docker-compose

$ sudo chmod +x /usr/local/bin/docker-compose2.
3.
1.
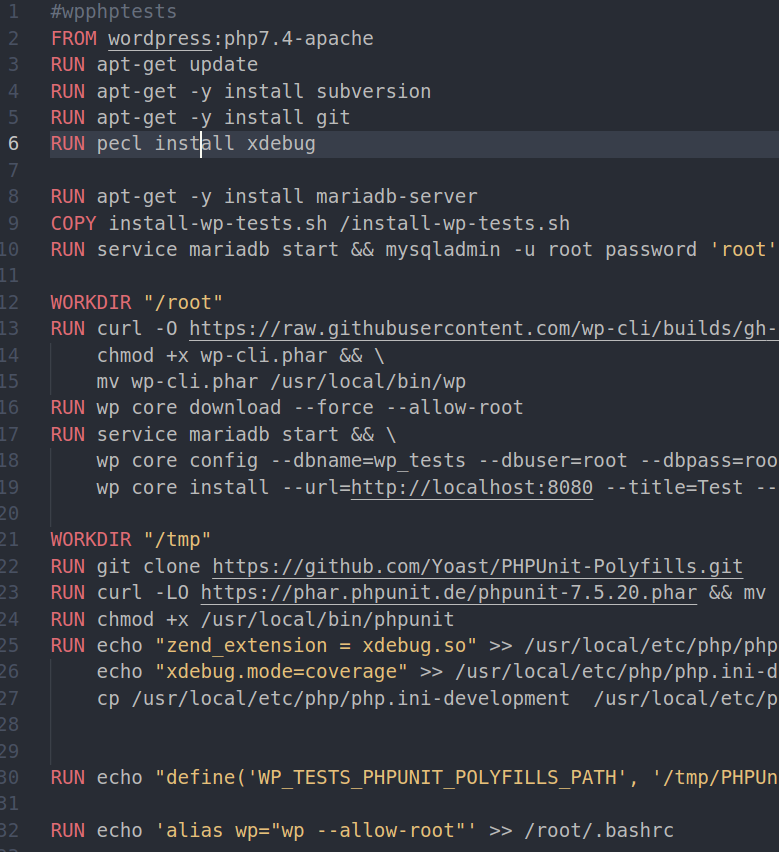
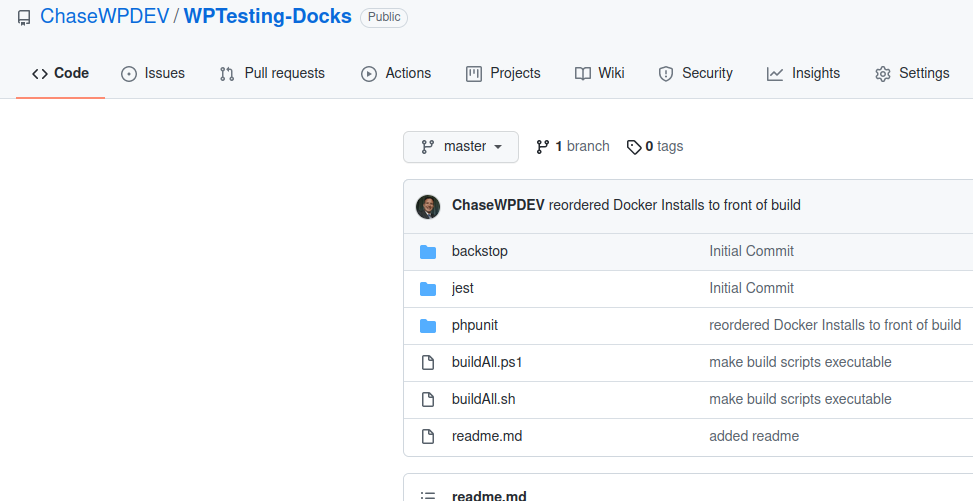
I’ve got a repo of Dockerfiles for test environments on Github.
Clone/ Download it.
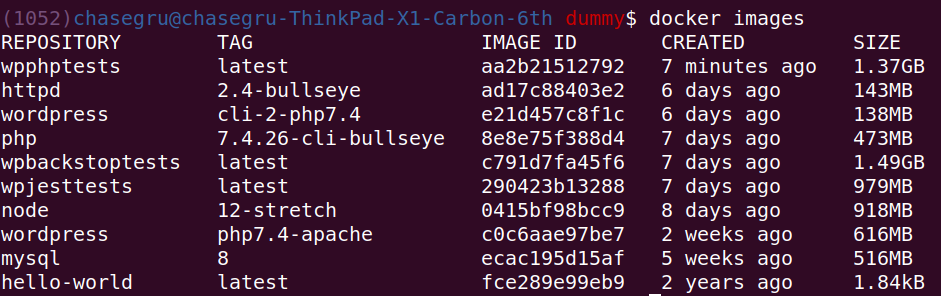
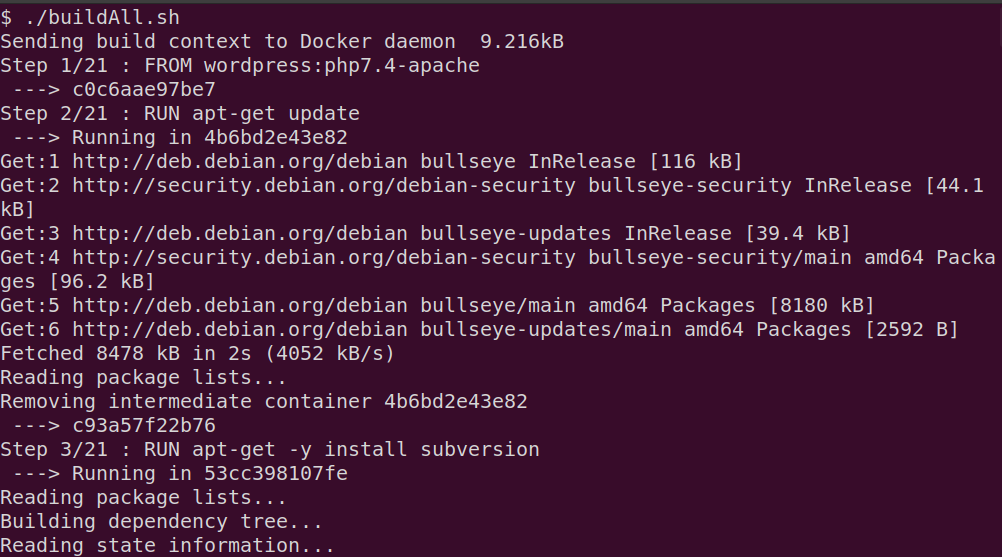
Within that repo is a buildAll.ps1 and buildAll.sh file. Run the applicable file to build the images.
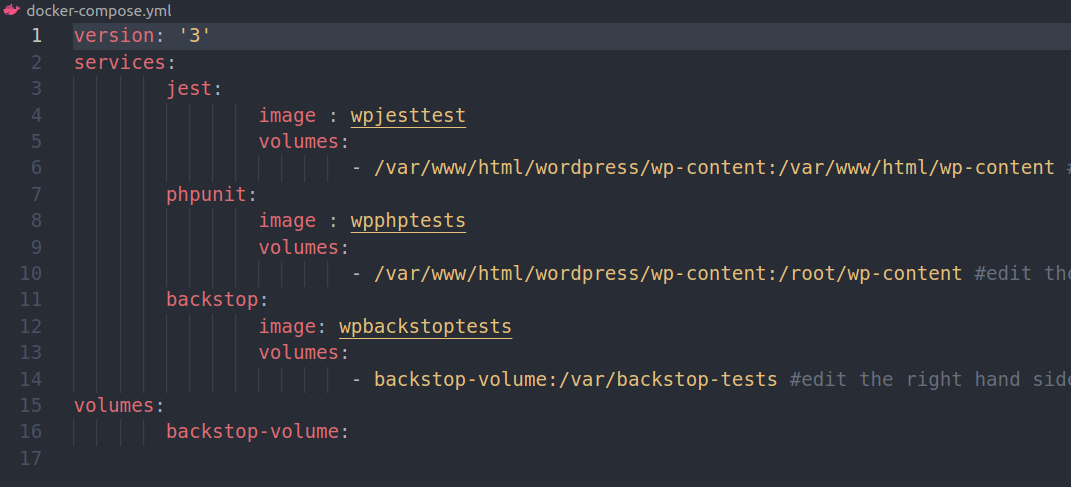
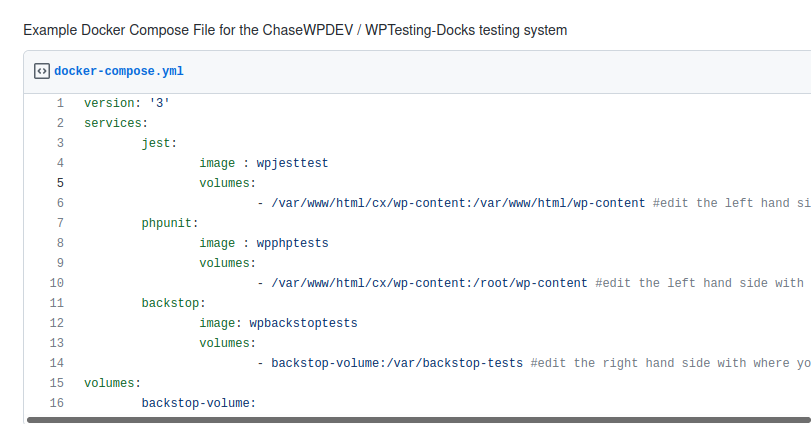
Create a docker-compose.yml file in the project you want to test in. Load it with the contents of this gist and edit it to your file system, per the comments in the file.
- Conserving Disk Space: Docker is not parsimonious with disk space, leaving untagged images and stopped containers stored–just in case you need them in the future. I recommend
docker system prune
for quick and easy garbage collection, alongside the less intrusivedocker-compose down.
- Dockerfiles: I should note that I am not working “According to Hoyle” by providing the Dockerfiles and having you run the build.rather than setting up a standalone image on docker hub that you pull I want everyone to see exactly what’s going into their build, and make improvements if neededeither locally, or via comments and pull requests on the repo 🙂
- Entry points: By default, these build will drop you in the wp-content directory of your image, if it’s more convenient for you to run tests in a sub-directoryand you don’t want to cd into them each time you, consider adjusting the entrypoint in the docker-compose.yml file
- Updating: Docker images are cached, so they only need to be built once. However if you want a fresh build (with a WordPress upgrade, for example) look into the no-cache flag on the docker build command
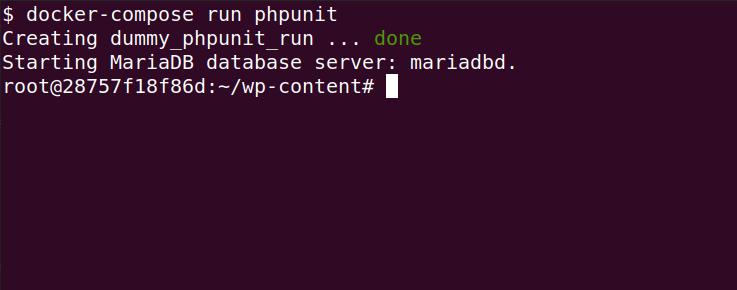
Game Time. From the dir with your docker-compose.yml file, run:
$ docker-compose run phpunitWhich should drop you here:
From here you can move (cd) around. Changes you make to your mounted volume will be reflected in your files. Start by navigating to themes or plugin directory (depending on your project) and scaffolding tests.
$ wp scaffold theme-tests [<theme>]Or
$ wp scaffold plugin-tests [<plugin>]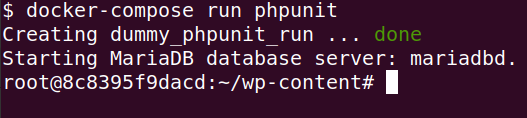
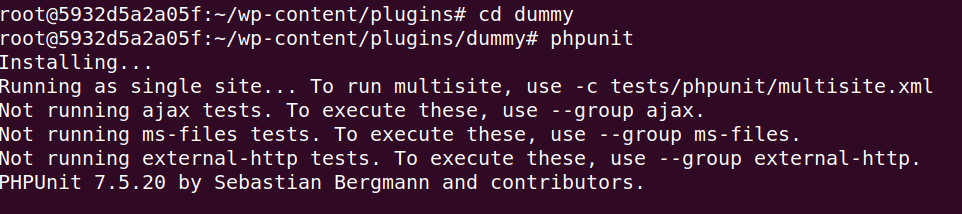
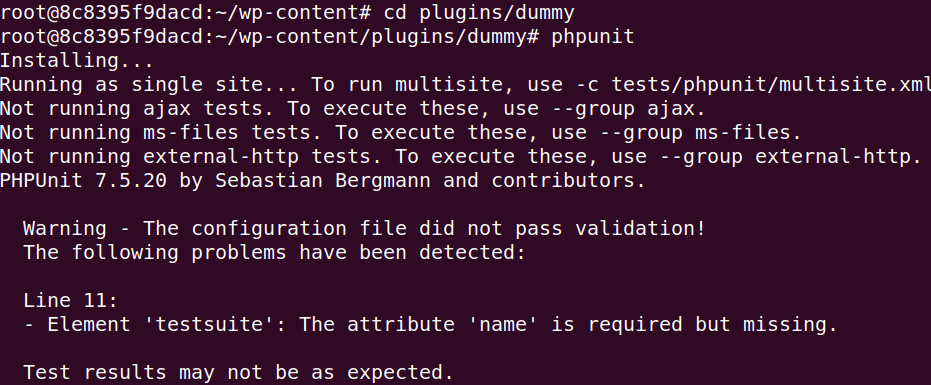
Now move into your plugin or theme, and run phpunit. You’ll get an attempt at testing, followed by some angry messages, but confirming that we can run tests.
| Command | Name |
|---|---|
| pwd | ‘print working dir’- tells you where you are |
| ls | list the contents of the working dir |
| cd somewhere | change directory to ‘somewhere’ subfolder |
| cd .. | change into the parent directory |
| cd /root/wp-content/plugins | cd starting with a / goes to the absolute directory |
If you’re new to the bash command line. You’ll need to overcome a slight learning curve to move around. There are complete tutorials out there — but here’s a quick starter-set of commands.
With that, your environment is set up and we can start to configure and build some tests!
Hopefully, you found that relatively painless. If not, or you’ve got some ideas about how we can make it better, please leave me some comments on the GitHub Repo and we’ll work to improve this even further.
Now, to get those tests running, we’ll need to tweak the phpunit.xml and bootstrap.php files for integration testing.
Keyboard shortcuts
Down arrow Next slide
Up arrow Previous slide
Color codes
Hover over text more additional info